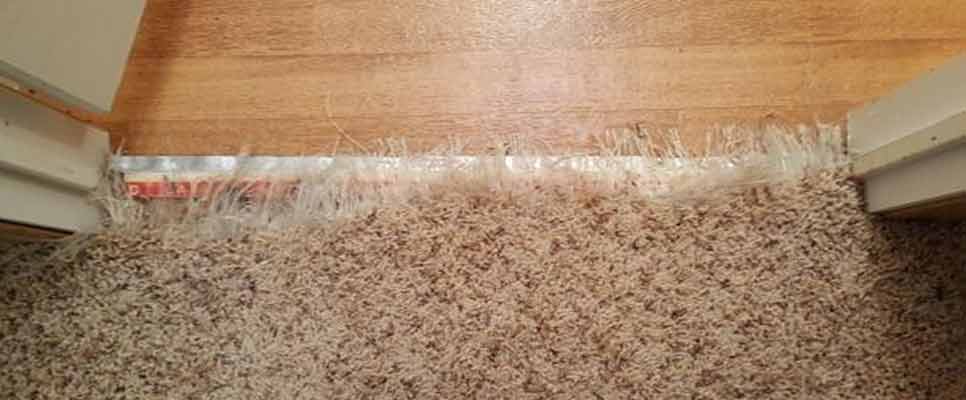
A well-maintained carpet can add comfort and warmth to your home, but over time, you might notice the edges of your carpet coming up. This can be unsightly and even dangerous, as it poses a tripping hazard. However, fear not! In this blog post, we’ll explore how to fix carpet that’s coming up at the edges. With over 10 years of experience in carpet cleaning and repair, I’ll guide you through the process, providing simple steps for an effective fix.
Gather Your Tools and Materials
Before you start repairing your carpet, it’s essential to gather the necessary tools and materials. Here’s what you’ll need:
- Carpet glue or adhesive
- A utility knife or carpet shears
- A straightedge or ruler
- A heavy book or weight
- A towel or cloth
Identify the Cause
Before you can address the issue, it’s essential to understand why your carpet is coming up at the edges. Common causes include:
- Improper Installation: If the carpet wasn’t installed correctly, it’s more likely to come up at the edges.
- Wear and Tear: Over time, foot traffic and other stress can cause the carpet to loosen at the edges.
- Humidity: Changes in humidity levels can affect the carpet adhesive, causing it to weaken.
Prepare the Area
Before you start the carpet repair process, it’s crucial to create a clean and unobstructed workspace. Here are the essential steps to prepare the area effectively:
- Clear the Space: First and foremost, remove any furniture or objects from the area where the carpet is coming up. This will give you ample room to work and ensure that nothing hinders the repair process.
- Vacuum Thoroughly: Once the space is clear, grab your vacuum cleaner and carefully vacuum the area around the loose carpet. This step is essential to eliminate any dirt, dust, or debris that could interfere with the adhesive’s effectiveness. A clean surface ensures a strong and long-lasting bond when you reattach the carpet.
By following these preparatory steps, you set the stage for a successful carpet repair, making the entire process smoother and more effective.
Reattaching the Carpet for a Seamless Fix
With your workspace prepared, it’s time to move on to the critical step of reattaching the loose carpet edge. Here’s a detailed breakdown of how to do it right:
- Lift the Carpet Gently: Begin by gently lifting the loose edge of the carpet. This will expose both the carpet’s backing and the subfloor underneath. When doing this, be careful not to cause any further damage to the carpet or the surrounding area.
- Apply Carpet Adhesive: For a durable and long-lasting repair, choose a high-quality carpet adhesive specifically designed for carpet repair. Apply the adhesive generously to both the backing of the carpet and the exposed subfloor. A uniform application is crucial to ensure a strong bond.
- Press and Hold Firmly: Carefully press the loose carpet edge back down onto the subfloor, ensuring that it aligns correctly with the surrounding carpet. To achieve a secure bond, use a heavy book, weight, or a similar object to hold the carpet in place. Applying even pressure ensures that the carpet adheres firmly to the adhesive, minimizing the risk of future problems.
- Allow Adequate Drying Time: After the carpet edge has been reattached, it’s essential to exercise patience. Follow the manufacturer’s instructions on the adhesive product for the recommended drying time. This step is critical, as premature foot traffic or disturbances may weaken the bond. Typically, drying may take several hours, so plan accordingly and avoid stepping on the repaired area until it’s completely dry.
By following these steps meticulously, you can effectively reattach your carpet edge, achieving a seamless, professional-looking repair that not only enhances the appearance of your space but also ensures its safety. A secure bond between the carpet and the subfloor is the key to a long-lasting solution.
Trimming Excess Carpet for a Professional Finish
After allowing the adhesive to fully dry and secure the carpet in place, you may find that there’s some excess carpet hanging over the edge. To ensure your carpet repair looks neat and polished, follow these steps:
- Utilize a Straightedge or Ruler: Begin by placing a straightedge or ruler along the edge of the carpet where the excess material protrudes. This will serve as a guide to ensure a straight and even cut.
- Trim with Precision: Now, using a utility knife or carpet shears, carefully trim the excess carpet along the edge. It’s crucial to maintain a steady hand and cut along the straightedge, ensuring that the cut is as even as possible. This step not only improves the appearance of the repair but also eliminates any tripping hazards caused by loose or uneven carpet edges.
- Neaten the Edge: As you trim, periodically inspect the edge to ensure it remains tidy and uniform. Make any necessary adjustments to guarantee that the cut is even and flush with the surrounding carpet.
By following these steps to trim excess carpet, you’ll achieve a professional and polished finish, restoring the visual appeal of your carpet while also eliminating safety concerns. A neatly trimmed carpet edge is not only aesthetically pleasing but also ensures that the carpet remains securely in place.
Ensuring a Flawless Bond: Pressing Down the Carpet
In some instances, even after following the reattachment process, your carpet may not lay entirely flat along the edge. This can be due to a variety of factors, including variations in the carpet’s thickness or the condition of the subfloor. To address this issue and create a secure and seamless bond, consider the following technique:
- Identify Uneven Areas: After reattaching the carpet, assess whether any areas along the edge are not sitting perfectly flat. You might notice slight bumps, wrinkles, or gaps that need correction.
- Gather a Towel or Cloth: To address these imperfections, you’ll need a clean towel or cloth. Ensure that the fabric is clean and free from debris, as any foreign particles could interfere with the adhesive’s effectiveness.
- Press the Carpet Down: Lay the towel or cloth over the uneven area of the carpet edge. Using your hands, apply firm and even pressure to press the carpet down. This action helps the carpet adhere more securely to the adhesive underneath. Be thorough in your approach, moving along the entire length of the affected edge to ensure a consistent and secure bond.
- Additional Weight (Optional): In cases where the carpet still doesn’t conform to the subfloor as desired, you can add extra weight on top of the cloth. A stack of books or a heavy object can be gently placed over the cloth for a few hours to encourage the carpet to conform to the subfloor.
This technique of pressing the carpet down is particularly useful for addressing uneven sections and ensuring that the bond between the carpet and the adhesive is robust. It aids in achieving a smooth and uniform appearance, eliminating any visible imperfections along the carpet edge.
By incorporating this additional step into your carpet repair process, you’ll enhance the effectiveness of your repair and elevate the overall aesthetics of your carpeted area.
Adding the Finishing Touches for a Long-Lasting Carpet Edge Repair
After reattaching the carpet edge and trimming any excess material, it’s essential to complete the repair with some finishing touches that ensure the longevity and quality of your work. Here are the final steps to consider:
- Weight the Edge for Stability: To reinforce the bond between the carpet and the subfloor, place a heavy weight along the repaired edge. A stack of books or a similarly substantial object can be used for this purpose. Leave the weight in place for a few hours to allow the adhesive to set firmly. This extra step adds an extra layer of assurance that the repair will stand the test of time.
- Check for Loose Seams and Edges: While you’re working on your carpet repair project, take the opportunity to inspect the entire carpet for any other loose seams or edges that might require attention. Fixing these issues proactively can help prevent future problems and maintain the overall integrity of your carpet.
- Prevent Future Edge Issues: To reduce the likelihood of carpet edges coming up in the future, it’s essential to address the root causes of the problem. Ensure that your carpet is installed correctly by a professional, as improper installation is a common cause of edge issues. Additionally, maintaining a consistent indoor humidity level can help preserve the strength of the adhesive. Fluctuations in humidity can weaken the bond, so consider using a humidifier or dehumidifier to keep your home’s environment stable.
Expert Tip: Consider Using a Carpet Seam Sealer
For an extra layer of protection and to maintain a long-lasting bond along the carpet edge, consider using a carpet seam sealer. This specialized product is designed to prevent fraying and secure the edge where the carpet meets the subfloor. Applying a seam sealer can be an effective preventative measure, ensuring that your repair remains in excellent condition over time.
By following these finishing touches and expert tips, you’ll not only complete your carpet edge repair with finesse but also take measures to safeguard your carpet from future issues. A well-maintained and secure carpet edge contributes to the overall safety, aesthetics, and longevity of your flooring.
Conclusion
Fixing carpet that’s coming up at the edges doesn’t have to be a daunting task. By following these simple steps, you can restore the aesthetics and safety of your carpeted areas. Remember to identify the cause of the issue, prepare the area, reattach the carpet with quality adhesive, trim any excess, and take the necessary finishing touches.
Keep in mind that if you’re uncertain about handling the repair yourself, it’s always a good idea to consult a professional carpet repair service to ensure a job well done. A properly repaired carpet not only enhances the look of your home but also ensures the safety of your loved ones.
Published on: October 30, 2023
Last updated on: November 2, 2023