199 Gawler Pl, Adelaide SA 5000, Australia 24×7 Available

How to Fix a Squeaky Floor Under Carpet: A Step-by-Step Guide

Squeaky floors can be an annoying issue, disrupting the peace and quiet of your home. Fortunately, fixing a squeaky floor beneath a carpet is a manageable task that can be accomplished with a few simple steps. This guide will walk you through the process, allowing you to restore peace to your home and silence those bothersome floor squeaks.

Step 1: Locate the Squeak

Before you begin fixing the squeaky floor, identify the exact location of the noise. Walk across the room and pinpoint the areas where the floor squeaks. Use your foot to press down on the carpet to determine the precise spot where the floorboards rub against each other or against the subfloor, causing the squeaking sound.

Step 2: Lift the Carpet

Once you’ve identified the squeaky area, use a pair of pliers or a utility knife to gently lift the carpet. Be cautious not to damage the carpet fibers. Lift it enough to gain access to the subfloor and floorboards beneath.

Step 3: Insert Shims or Screws

If the squeak is caused by floorboards rubbing against each other, insert wooden shims into the gaps between the boards. Alternatively, you can use specially designed squeak elimination screws available at hardware stores. Place the shims or screws strategically along the seams of the floorboards and subfloor to secure them in place and prevent movement.

Step 4: Tighten the Floorboards

For loose floorboards causing the squeak, use screws to secure them firmly to the subfloor. Drive screws through the floorboards into the floor joists beneath. Ensure the screws penetrate both the subfloor and the floorboards, pulling them tightly together without causing any damage.

Step 5: Trim Excess Material

If you used shims, trim off any excess material that protrudes beyond the edges of the floorboards. This will ensure that the carpet lays flat when reinstalled and does not create any visible bulges.

Step 6: Reattach the Carpet

Carefully lay the carpet back over the repaired area. Smooth out any wrinkles or creases to ensure a neat and even appearance. Use a knee kicker or carpet stretcher if necessary to reattach the carpet securely along the edges.

Step 7: Test the Floor

After reattaching the carpet, walk across the repaired area to test for squeaks. Apply pressure to the previously squeaky spots to confirm that the repairs have been successful. If the squeaks persist, you may need to repeat the process or consider seeking professional assistance.

Conclusion

Fixing a squeaky floor under carpet is a task that can be accomplished with a bit of patience and the right tools. By following these steps, you can effectively eliminate those bothersome squeaks and restore peace and quiet to your home. Remember to exercise caution while lifting the carpet and working on the floorboards to prevent any damage. Enjoy your newly silent floors! You can always hire our local carpet repair experts.

Fixing frayed carpet in a doorway can be a relatively simple task if approached systematically and with the right tools. Frayed carpet not only looks unsightly but also poses a tripping hazard. Repairing it promptly can prevent further damage and prolong the life of your carpet. Here is a detailed guide on how to fix frayed carpet in a doorway:

Tools and Materials Needed:

  1. Utility Knife or Carpet Cutter: To trim loose fibers and cut the damaged area.
  2. Heavy-duty Scissors: For precision cutting and trimming.
  3. Carpet Adhesive: To secure the carpet fibers and prevent unraveling.
  4. Straight Edge or Ruler: To guide straight cuts.
  5. Pliers: For pulling up any stubborn loose fibers.
  6. Matching Carpet Remnant or Patch: If the damage is extensive, you may need a piece of matching carpet.
  7. Double-sided Carpet Tape (if using a patch): To secure the patch in place.
  8. Seam Roller: For pressing down the repaired area and ensuring a smooth finish.

Step-by-Step Guide:

1. Assess the Damage:

  • Examine the frayed area to understand the extent of the damage. Determine if it’s a minor fray or a larger tear that needs a patch.

2. Trim Loose Fibers:

  • Use scissors or a utility knife to carefully trim any loose or frayed fibers to create a neat edge. Be cautious not to cut too much or damage the surrounding carpet.

3. Apply Carpet Adhesive:

  • Apply a small amount of carpet adhesive along the trimmed edges of the frayed area. Use a toothpick or cotton swab for precision. This will help secure the fibers and prevent further unraveling.

4. Flatten the Carpet:

  • Use a seam roller or a heavy object to press down on the repaired area to ensure the adhesive bonds well and the carpet lays flat.

5. Patching (If Necessary):

  • If the damage is extensive, consider using a matching carpet remnant or patch.
  • Cut a piece of the matching carpet slightly larger than the damaged area.
  • Apply double-sided carpet tape around the perimeter of the damaged area.
  • Carefully place the patch over the damaged section, ensuring it aligns with the carpet grain.

6. Secure the Patch:

  • Use a seam roller to firmly press down on the patched area to ensure it adheres properly.

7. Final Trim (If Patched):

  • Trim any excess fibers from the patched area using scissors for a seamless finish.

Tips:

  • Take Your Time: Rushing through the repair may lead to further damage.
  • Use Sharp Tools: Dull tools can cause uneven cuts and more damage to the carpet.
  • Test Adhesives: Always test a small amount of adhesive on a hidden area of the carpet to ensure it doesn’t discolor or damage the fibers.

Precautions:

  • Safety First: Be cautious when using sharp tools to avoid injury.
  • Ventilation: Ensure the area is well-ventilated when using adhesives.

Conclusion:

Repairing frayed carpet in a doorway can restore the appearance of your carpet and prevent accidents. By following these steps carefully and using the right tools, you can effectively fix minor frays or larger tears in your carpet, maintaining its durability and aesthetic appeal. If the damage is extensive or if you’re unsure about handling the repair, consider seeking professional help to ensure a proper and long-lasting fix.


Also Read:

If you’ve decided to install a new carpet in your home, it’s important to ensure that it stays securely in place for years to come. One essential element for a successful carpet installation is fitting carpet gripper strips correctly. These strips, also known as tack strips, are the hidden heroes that keep your carpet firmly in place. In this guide, I will walk you through the process of fitting carpet gripper like a pro. With 10 years of experience in the carpet cleaning and repair industry, I’m here to share my knowledge and expertise to help you achieve a job well done.

How to Fit Carpet Gripper

What is a Carpet Gripper?

Carpet gripper, also known as tack strip, is a vital component of any carpet installation. It is a thin strip of wood or plastic with hundreds of sharp nails pointing upwards. These nails grip the carpet backing, preventing it from shifting or sliding. Properly installed gripper strips ensure your carpet remains taut and wrinkle-free.

How to Fit Carpet Gripper

Tools and Materials You’ll Need

Before we delve into the installation process, let’s gather the necessary tools and materials:

  1. Carpet gripper strips
  2. Hammer
  3. Nails
  4. Measuring tape
  5. Pencil or marker
  6. Safety goggles and gloves
  7. Saw or tin snips (for cutting gripper strips if needed)
  8. Carpenter’s level
  9. Dustpan and brush
  10. Knee kicker (optional, for stretching carpet)

Step 1: Measure and Plan

Start by measuring the perimeter of the room where you plan to install the carpet. It’s crucial to have an accurate measurement to ensure you purchase the right amount of carpet gripper strips. Typically, you’ll need one strip for each straight wall, but make sure to account for any curved or irregularly shaped walls as well.

Step 2: Cutting Gripper Strips

If the room has curved or irregularly shaped walls, you may need to cut the carpet gripper strips to fit the contours. Use a saw or tin snips to make the necessary cuts. Remember to wear safety goggles and gloves to protect yourself from any sharp edges.

Step 3: Safety First

Safety is of utmost importance. Ensure you wear safety goggles and gloves throughout the installation process to protect your eyes and hands from potential injuries.

Step 4: Position the Gripper Strips

Place the gripper strips around the perimeter of the room, leaving a gap of about 1/4 inch between the wall and the strip. This gap allows for some space when tucking the carpet, preventing it from bunching up against the wall. Make sure the sharp nails on the strips face the wall and the carpeted area.

Step 5: Check for Level

Use a carpenter’s level to ensure that the gripper strips are level and not tilted. Level strips are crucial for a smooth and even carpet installation.

Step 6: Secure the Strips

Secure the gripper strips in place by nailing them down. Place nails about every 2 inches, ensuring that the strip is firmly anchored to the subfloor. The sharp nails should penetrate the subfloor but not protrude through it.

Step 7: Trim Excess Strips

If you have any excess gripper strips, trim them to fit within the perimeter of the room. You want the strips to be snugly against the walls but not extend beyond them.

Step 8: Cleanup

After all the strips are securely in place, use a dustpan and brush to clean up any wood shavings or debris. A clean working area will make the carpet installation process much smoother.

Step 9: Install the Carpet

With the gripper strips in place, you’re ready to install your carpet. Here’s a simplified version of how to do it:

  1. Roll out the carpet and align it with the room’s edges.
  2. Use a knee kicker (if available) to stretch the carpet toward one end of the room.
  3. Tuck the carpet edge into the gap between the gripper strip and the wall using a putty knife or your fingers.
  4. Work your way around the room, stretching and tucking the carpet until it’s snug against all the gripper strips.
  5. Trim any excess carpet along the edges, leaving a slight overlap for a clean and neat finish.

Also Read: How to Get Furniture Marks Out of Carpet?

Conclusion

Properly fitting carpet gripper strips is a fundamental step in achieving a professional-quality carpet installation. With the right tools, careful measurements, and attention to detail, you can ensure your carpet remains securely in place for years to come.

Remember to prioritize safety by wearing protective gear, and always double-check your measurements to avoid running out of gripper strips. If you’re unsure about any step in the process, it’s best to consult with a professional carpet installer.

By following these simple steps, you’ll be well on your way to a beautifully installed carpet that stays firmly in place, enhancing the comfort and aesthetics of your home.

Cite your sources and link to instructional videos or diagrams if available, and you’ll have a comprehensive guide to fitting carpet gripper that anyone can follow with ease.

Our furry friends can bring immeasurable joy and companionship to our lives, but they can also leave their mark on our carpets in the form of unsightly damage. Whether it’s claw marks, stains, or frayed edges, dealing with pet-related carpet damage is a common challenge for many pet owners. In this guide, we will share expert insights on how to repair carpet damage caused by pets and bring your carpets back to their former glory.

How to Repair Carpet Damage by Pets

Identifying the Damage

The first step in addressing pet-related carpet damage is to identify the type and extent of the damage. This will help you choose the most appropriate repair method. Common types of pet-related carpet damage include:

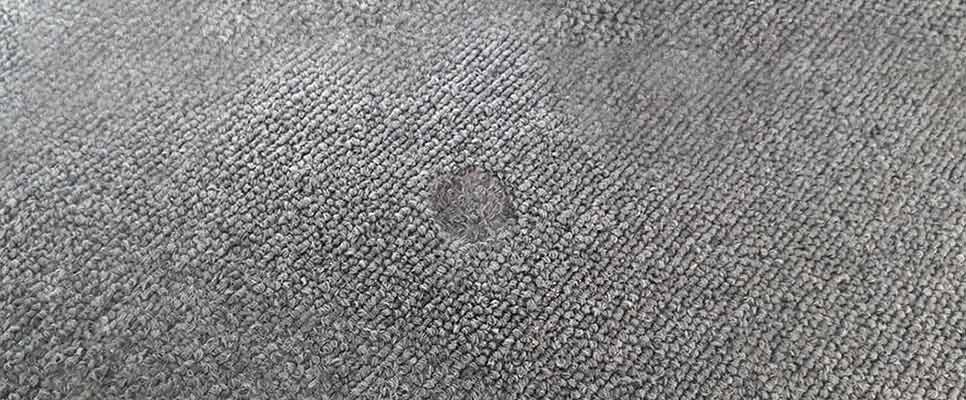
1. Claw Marks: Pets, especially cats, may scratch or dig their claws into the carpet, leaving visible marks.

2. Stains: Pet accidents can result in stains that are not only unsightly but can also produce odors.

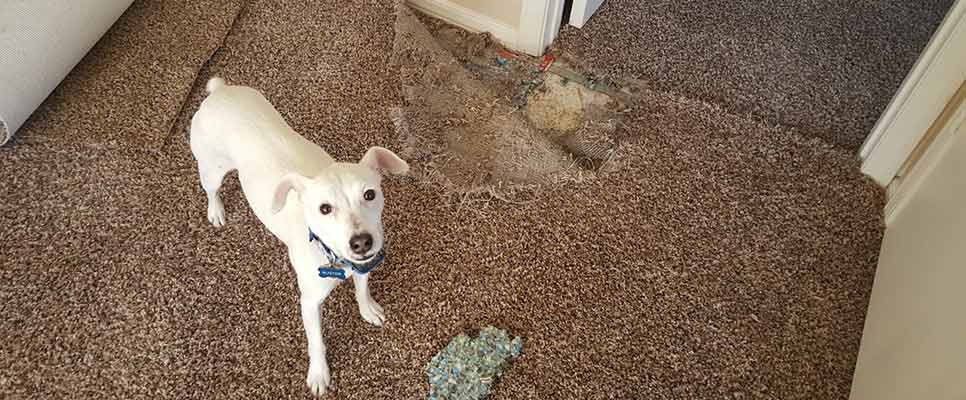
3. Frayed Edges: Dogs and cats can pull at carpet edges, causing them to fray or unravel.

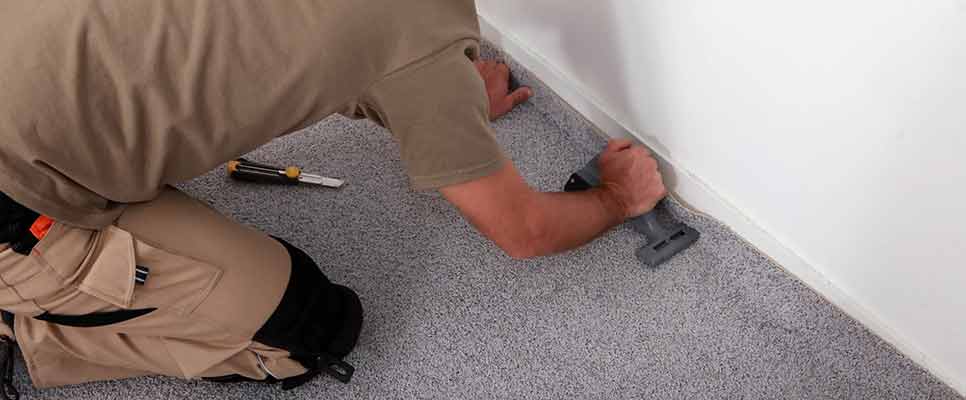
Basic Carpet Cleaning and Maintenance

Before diving into specific repair methods, it’s essential to maintain good carpet hygiene:

1. Regularly vacuum the carpet to remove dirt and pet hair.

2. Clean up pet accidents promptly to prevent stains from setting.

3. Use pet-friendly cleaning products to remove pet odors and stains.

Reviving Your Carpet: Repairing Claw Marks

Claw marks from pets can be a common issue, but with the right approach, you can effectively repair these blemishes and prevent further damage. Here’s a step-by-step guide for repairing claw marks on your carpet:

1. Regular Nail Maintenance: To prevent further damage, it’s essential to maintain your pet’s nails by trimming them regularly. This reduces the likelihood of deep scratches and claw marks on the carpet.

2. Tease Out Carpet Fibers: For minor claw marks and snags, use a fine-toothed comb to gently tease out the affected carpet fibers. This can often help to camouflage and smooth the damaged area.

3. Trim Damaged Fibers: In cases where the damage is more extensive and teasing out the fibers doesn’t suffice, you may need to trim the damaged fibers with sharp scissors. Carefully cut the fibers to create a more even and less noticeable surface.

By following these steps, you can effectively repair claw marks on your carpet, restoring its appearance and ensuring it remains in good condition. Regular nail maintenance for your pet is also a proactive measure to prevent future damage.

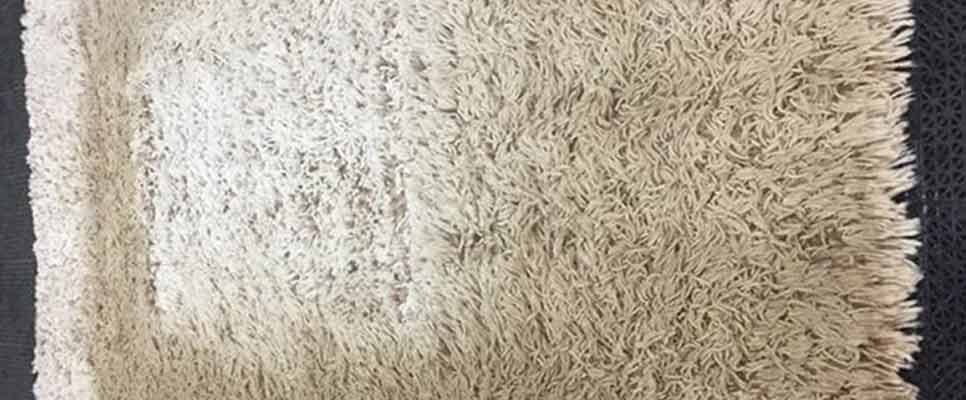
Effectively Addressing Carpet Stains: Tips and Techniques

Pet stains can be particularly challenging to deal with due to their potential to leave both visible marks and lingering odors. Here’s a comprehensive step-by-step guide to effectively address pet stains on your carpet:

1. Blot the Stain: Begin by blotting up as much of the pet stain as possible using paper towels or a clean cloth. Press down gently to absorb the liquid without spreading the stain.

2. Prepare a Cleaning Solution: Create a cleaning solution by mixing equal parts water and white vinegar. This mixture is effective in neutralizing odors and breaking down the stain.

3. Scrub Gently: Dip a soft cloth or a scrub brush into the water and white vinegar solution, then gently scrub the stained area. Work in a circular motion, being cautious not to damage the carpet fibers. Continue until the stain is no longer visible.

4. Rinse and Dry: Rinse the treated area with clean water to remove any residual cleaning solution. Blot the area dry with paper towels or a clean cloth. Ensure it’s thoroughly dried to prevent mold or mildew growth.

5. Address Lingering Odors: If persistent odors remain, consider using an enzymatic pet stain remover. Follow the product’s instructions for application and allow it to dry completely.

By following these steps, you can effectively address pet stains, restoring the cleanliness and freshness of your carpet. Remember that acting promptly is key to preventing stains from setting in and becoming more difficult to remove.

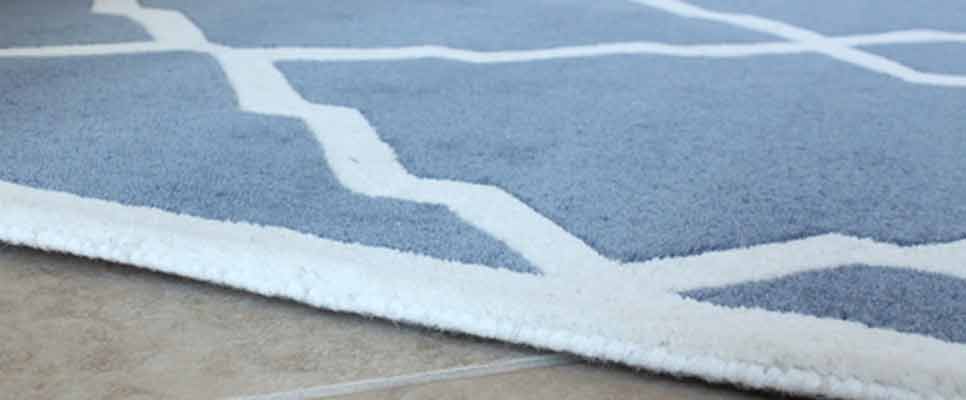
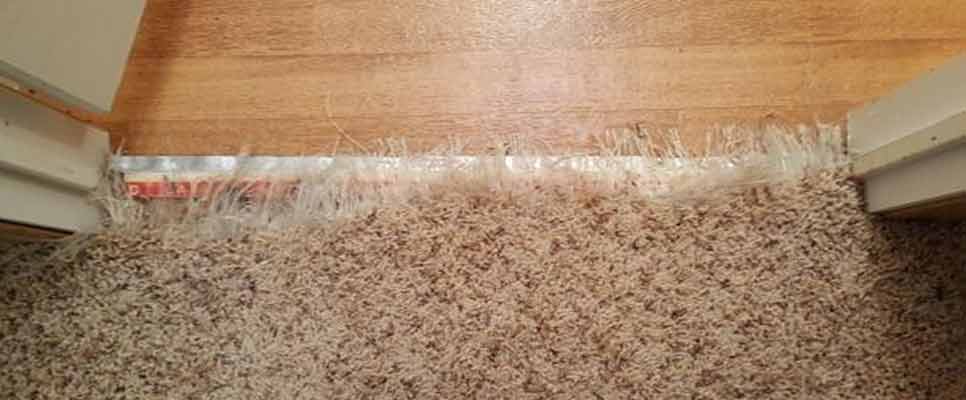
Restoring the Elegance of Your Carpets: Repairing Frayed Edges

Frayed carpet edges can be a common issue, but with some simple steps, you can restore the appearance and integrity of your carpet. Here’s a step-by-step guide on repairing frayed edges:

1. Trim Carefully: Begin by carefully inspecting the frayed area. Using sharp scissors, trim away any loose or frayed edges. Be sure to make clean and precise cuts to prevent further unraveling.

2. Apply Fabric-Friendly Glue: Once you have trimmed the frayed edges, apply a small amount of clear glue that is safe for fabric. It’s crucial to choose a glue that won’t damage the carpet’s material. Apply the glue along the trimmed edge, ensuring even coverage.

3. Press and Hold: Gently press the glued edge back into its original position. Hold it firmly in place until the glue sets and dries. This may take a few minutes, so exercise patience to ensure a secure bond.

By following these steps, you can effectively repair frayed carpet edges, not only improving the carpet’s appearance but also preventing the fraying from spreading further. It’s a practical and budget-friendly solution to extend the life of your carpet.

Reviving Your Carpets Through Expert Patching

For larger or irreparable damage, consider patching the affected area:

1. Cut a patch of carpet from an inconspicuous area, like a closet or an extra piece if you have one.

2. Apply double-sided carpet tape to the damaged area.

3. Press the patch onto the tape, aligning the carpet fibers carefully.

4. Trim any excess patch material and blend it into the surrounding carpet.

The Value of Seeking Professional Assistance for Carpet Care

Sometimes, pet-related carpet damage can be severe or extend beyond what you can easily repair yourself. In such cases, it’s wise to seek the help of a professional carpet cleaner or repair specialist. They have the expertise and tools to tackle extensive damage effectively.

Also Read: Why Do Some Carpets Shed and Fuzz?

Proactive Strategies for Preventing Pet-Related Carpet Damage

Taking preventative measures to safeguard your carpets against pet-related damage is undoubtedly the wisest approach to ensure their longevity and visual appeal. In this regard, there are several proactive steps you can incorporate into your pet-friendly home environment.

To begin with, opt for carpets designed specifically for pet owners. These carpets boast superior durability and resistance to stains and damage, which makes them a smart investment. Additionally, placing pet mats beneath your pet’s food and water dishes can be highly effective in preventing spills and stains from reaching your carpet. This small but practical addition can go a long way in maintaining the pristine appearance of your flooring.

For cat owners, offering scratching posts is a beneficial strategy. Cats often scratch to maintain their claws, and by providing them with designated scratching posts, you not only protect your carpets but also meet their natural instinctual needs.

Furthermore, pet training is an essential aspect of carpet preservation. Train your pets to avoid specific areas within your home or to utilize designated spots for scratching and bathroom needs. This proactive approach not only minimizes potential damage but also fosters a harmonious living environment for both you and your beloved pets. In conclusion, by implementing these preventative measures, you can enjoy a well-maintained carpet that remains beautiful and functional in your pet-friendly home.

Also Read: Will Vinegar Get Cat Pee Smell Out Of Carpet?

Conclusion

Repairing carpet damage caused by pets is a common challenge, but with the right knowledge and a bit of effort, you can make your carpets look as good as new. By identifying the type of damage, using appropriate repair methods, and taking preventative measures, you can keep your carpets in excellent condition while enjoying the company of your beloved pets. Remember that while some damage can be repaired at home, it’s always a good idea to consult with professionals for extensive or difficult-to-repair damage.

Carpets are a cozy and beautiful addition to our homes. They come in a variety of styles, colors, and materials, making it easy to find the perfect one to match your decor. However, if you’ve ever noticed loose fibers, fluff, or little “pills” on your carpet’s surface, you may wonder why some carpets shed and fuzz. In this in-depth blog post, we’ll explore the reasons behind this phenomenon and provide you with easy-to-understand explanations backed by credible sources.

Why Do Some Carpets Shed and Fuzz

Understanding Carpet Shedding and Fuzz

Carpet shedding and fuzz are common issues that occur in most types of carpets. Shedding refers to the release of loose fibers from the carpet’s surface, which can accumulate as small, fuzzy balls, commonly known as fuzz. These loose fibers can be made of various materials, such as wool, synthetic fibers, or a blend of both. Shedding and fuzzing are natural processes that can be attributed to several factors.

Fiber Type and Quality

The type and quality of carpet fibers play a significant role in shedding and fuzzing. Carpets made from natural fibers, such as wool, tend to shed more than those made from synthetic materials. Wool fibers have tiny scales that can interlock and cause friction, leading to shedding. Synthetic fibers, on the other hand, are generally more resilient and less prone to shedding.

High-quality carpets made from premium materials typically shed less because they undergo more rigorous manufacturing processes to reduce loose fibers.

Manufacturing Process

The manufacturing process of carpets influences shedding and fuzzing. During the production of carpets, fibers are spun, twisted, and woven into the carpet backing. The quality of the manufacturing process, including the tightness of the yarn twist, affects the carpet’s tendency to shed. Well-constructed carpets with higher yarn twist levels are less likely to shed and fuzz.

New Carpet Installation

When you first install a new carpet, it’s common for it to shed and fuzz more than older carpets. This is because some loose fibers remain from the manufacturing process and haven’t yet been vacuumed or walked on. Over time, regular vacuuming and foot traffic help remove these loose fibers, reducing shedding.

Foot Traffic and Use

As mentioned, foot traffic can help to reduce shedding in carpets. When you walk on a carpet, you compress the fibers and encourage them to settle into their proper position. Over time, the fibers become less prone to shedding and fuzzing.

Environmental Factors

Environmental factors also play a role in shedding and fuzzing. Dry climates with low humidity can cause carpet fibers to become more brittle and prone to shedding. Conversely, high humidity can make fibers more elastic and less likely to shed. Maintaining proper indoor humidity levels can help reduce shedding.

Cleaning and Maintenance

Proper cleaning and maintenance can significantly impact shedding and fuzzing. Regular vacuuming is essential to remove loose fibers and prevent them from accumulating on the surface. Be sure to use a vacuum with a beater bar or brush to agitate the fibers and promote their alignment. Avoid using vacuums with high suction power, which can pull out more fibers.

Causes of Fuzz in Carpets

Fuzz, those little balls of fibers that form on the carpet’s surface, are typically the result of shedding fibers tangling together and forming tiny clumps. Fuzz can be caused by the factors mentioned above, and there are a few additional reasons for its formation:

Poor-Quality Carpet

Low-quality carpets, especially those with loose or poorly twisted fibers, are more prone to forming fuzz. It’s important to invest in a high-quality carpet to minimize this issue.

Aggressive Cleaning Methods

Excessive use of aggressive cleaning methods like harsh brushes or abrasive cleaners can lead to damage and fuzzing on the carpet’s surface. Always follow the manufacturer’s recommended cleaning guidelines to prevent fuzz from forming.

Pets and Sharp Objects

Pets with sharp claws or objects with sharp edges can contribute to fuzz formation when they snag the carpet fibers. Be cautious when allowing pets on your carpet, and avoid placing sharp objects directly on the carpet.

Also Read: How to Repair Carpet Damage by Pets

Conclusion

In summary, shedding and fuzzing in carpets are natural processes influenced by factors like fiber type, manufacturing quality, installation, foot traffic, and environmental conditions. Shedding is more common in wool or natural fiber carpets, while synthetic fibers are less prone to shedding. Quality and proper maintenance are key factors in minimizing shedding and fuzzing.

To maintain your carpet and keep shedding and fuzzing to a minimum, follow these tips:

  1. Invest in a high-quality carpet with tight yarn twists.
  2. Allow new carpets to settle with time, regular vacuuming, and foot traffic.
  3. Maintain proper indoor humidity levels.
  4. Regularly vacuum your carpet with a suitable vacuum cleaner.
  5. Follow the manufacturer’s cleaning guidelines and avoid aggressive cleaning methods.
  6. Be cautious with pets and sharp objects around the carpet.

Understanding the reasons behind shedding and fuzzing in carpets can help you better care for and enjoy your beautiful floor coverings. Remember that some shedding is natural and to be expected, but with proper care, you can keep your carpet looking its best for years to come.

Also Read: How to Fit Carpet Gripper

A well-maintained carpet can add comfort and warmth to your home, but over time, you might notice the edges of your carpet coming up. This can be unsightly and even dangerous, as it poses a tripping hazard. However, fear not! In this blog post, we’ll explore how to fix carpet that’s coming up at the edges. With over 10 years of experience in carpet cleaning and repair, I’ll guide you through the process, providing simple steps for an effective fix.

How to Fix Carpet Coming Up at Edges

Gather Your Tools and Materials

Before you start repairing your carpet, it’s essential to gather the necessary tools and materials. Here’s what you’ll need:

  • Carpet glue or adhesive
  • A utility knife or carpet shears
  • A straightedge or ruler
  • A heavy book or weight
  • A towel or cloth

Identify the Cause

Before you can address the issue, it’s essential to understand why your carpet is coming up at the edges. Common causes include:

  • Improper Installation: If the carpet wasn’t installed correctly, it’s more likely to come up at the edges.
  • Wear and Tear: Over time, foot traffic and other stress can cause the carpet to loosen at the edges.
  • Humidity: Changes in humidity levels can affect the carpet adhesive, causing it to weaken.

Prepare the Area

Before you start the carpet repair process, it’s crucial to create a clean and unobstructed workspace. Here are the essential steps to prepare the area effectively:

  1. Clear the Space: First and foremost, remove any furniture or objects from the area where the carpet is coming up. This will give you ample room to work and ensure that nothing hinders the repair process.
  2. Vacuum Thoroughly: Once the space is clear, grab your vacuum cleaner and carefully vacuum the area around the loose carpet. This step is essential to eliminate any dirt, dust, or debris that could interfere with the adhesive’s effectiveness. A clean surface ensures a strong and long-lasting bond when you reattach the carpet.

By following these preparatory steps, you set the stage for a successful carpet repair, making the entire process smoother and more effective.

Reattaching the Carpet for a Seamless Fix

With your workspace prepared, it’s time to move on to the critical step of reattaching the loose carpet edge. Here’s a detailed breakdown of how to do it right:

  1. Lift the Carpet Gently: Begin by gently lifting the loose edge of the carpet. This will expose both the carpet’s backing and the subfloor underneath. When doing this, be careful not to cause any further damage to the carpet or the surrounding area.
  2. Apply Carpet Adhesive: For a durable and long-lasting repair, choose a high-quality carpet adhesive specifically designed for carpet repair. Apply the adhesive generously to both the backing of the carpet and the exposed subfloor. A uniform application is crucial to ensure a strong bond.
  3. Press and Hold Firmly: Carefully press the loose carpet edge back down onto the subfloor, ensuring that it aligns correctly with the surrounding carpet. To achieve a secure bond, use a heavy book, weight, or a similar object to hold the carpet in place. Applying even pressure ensures that the carpet adheres firmly to the adhesive, minimizing the risk of future problems.
  4. Allow Adequate Drying Time: After the carpet edge has been reattached, it’s essential to exercise patience. Follow the manufacturer’s instructions on the adhesive product for the recommended drying time. This step is critical, as premature foot traffic or disturbances may weaken the bond. Typically, drying may take several hours, so plan accordingly and avoid stepping on the repaired area until it’s completely dry.

By following these steps meticulously, you can effectively reattach your carpet edge, achieving a seamless, professional-looking repair that not only enhances the appearance of your space but also ensures its safety. A secure bond between the carpet and the subfloor is the key to a long-lasting solution.

Trimming Excess Carpet for a Professional Finish

After allowing the adhesive to fully dry and secure the carpet in place, you may find that there’s some excess carpet hanging over the edge. To ensure your carpet repair looks neat and polished, follow these steps:

  1. Utilize a Straightedge or Ruler: Begin by placing a straightedge or ruler along the edge of the carpet where the excess material protrudes. This will serve as a guide to ensure a straight and even cut.
  2. Trim with Precision: Now, using a utility knife or carpet shears, carefully trim the excess carpet along the edge. It’s crucial to maintain a steady hand and cut along the straightedge, ensuring that the cut is as even as possible. This step not only improves the appearance of the repair but also eliminates any tripping hazards caused by loose or uneven carpet edges.
  3. Neaten the Edge: As you trim, periodically inspect the edge to ensure it remains tidy and uniform. Make any necessary adjustments to guarantee that the cut is even and flush with the surrounding carpet.

By following these steps to trim excess carpet, you’ll achieve a professional and polished finish, restoring the visual appeal of your carpet while also eliminating safety concerns. A neatly trimmed carpet edge is not only aesthetically pleasing but also ensures that the carpet remains securely in place.

Ensuring a Flawless Bond: Pressing Down the Carpet

In some instances, even after following the reattachment process, your carpet may not lay entirely flat along the edge. This can be due to a variety of factors, including variations in the carpet’s thickness or the condition of the subfloor. To address this issue and create a secure and seamless bond, consider the following technique:

  1. Identify Uneven Areas: After reattaching the carpet, assess whether any areas along the edge are not sitting perfectly flat. You might notice slight bumps, wrinkles, or gaps that need correction.
  2. Gather a Towel or Cloth: To address these imperfections, you’ll need a clean towel or cloth. Ensure that the fabric is clean and free from debris, as any foreign particles could interfere with the adhesive’s effectiveness.
  3. Press the Carpet Down: Lay the towel or cloth over the uneven area of the carpet edge. Using your hands, apply firm and even pressure to press the carpet down. This action helps the carpet adhere more securely to the adhesive underneath. Be thorough in your approach, moving along the entire length of the affected edge to ensure a consistent and secure bond.
  4. Additional Weight (Optional): In cases where the carpet still doesn’t conform to the subfloor as desired, you can add extra weight on top of the cloth. A stack of books or a heavy object can be gently placed over the cloth for a few hours to encourage the carpet to conform to the subfloor.

This technique of pressing the carpet down is particularly useful for addressing uneven sections and ensuring that the bond between the carpet and the adhesive is robust. It aids in achieving a smooth and uniform appearance, eliminating any visible imperfections along the carpet edge.

By incorporating this additional step into your carpet repair process, you’ll enhance the effectiveness of your repair and elevate the overall aesthetics of your carpeted area.

Adding the Finishing Touches for a Long-Lasting Carpet Edge Repair

After reattaching the carpet edge and trimming any excess material, it’s essential to complete the repair with some finishing touches that ensure the longevity and quality of your work. Here are the final steps to consider:

  1. Weight the Edge for Stability: To reinforce the bond between the carpet and the subfloor, place a heavy weight along the repaired edge. A stack of books or a similarly substantial object can be used for this purpose. Leave the weight in place for a few hours to allow the adhesive to set firmly. This extra step adds an extra layer of assurance that the repair will stand the test of time.
  2. Check for Loose Seams and Edges: While you’re working on your carpet repair project, take the opportunity to inspect the entire carpet for any other loose seams or edges that might require attention. Fixing these issues proactively can help prevent future problems and maintain the overall integrity of your carpet.
  3. Prevent Future Edge Issues: To reduce the likelihood of carpet edges coming up in the future, it’s essential to address the root causes of the problem. Ensure that your carpet is installed correctly by a professional, as improper installation is a common cause of edge issues. Additionally, maintaining a consistent indoor humidity level can help preserve the strength of the adhesive. Fluctuations in humidity can weaken the bond, so consider using a humidifier or dehumidifier to keep your home’s environment stable.

Expert Tip: Consider Using a Carpet Seam Sealer

For an extra layer of protection and to maintain a long-lasting bond along the carpet edge, consider using a carpet seam sealer. This specialized product is designed to prevent fraying and secure the edge where the carpet meets the subfloor. Applying a seam sealer can be an effective preventative measure, ensuring that your repair remains in excellent condition over time.

By following these finishing touches and expert tips, you’ll not only complete your carpet edge repair with finesse but also take measures to safeguard your carpet from future issues. A well-maintained and secure carpet edge contributes to the overall safety, aesthetics, and longevity of your flooring.

Conclusion

Fixing carpet that’s coming up at the edges doesn’t have to be a daunting task. By following these simple steps, you can restore the aesthetics and safety of your carpeted areas. Remember to identify the cause of the issue, prepare the area, reattach the carpet with quality adhesive, trim any excess, and take the necessary finishing touches.

Keep in mind that if you’re uncertain about handling the repair yourself, it’s always a good idea to consult a professional carpet repair service to ensure a job well done. A properly repaired carpet not only enhances the look of your home but also ensures the safety of your loved ones.

Carpet cleaning can be a challenging task, and it often involves using specialized cleaning solutions to tackle dirt, stains, and odors effectively. But have you ever wondered if you could use laundry detergent in your carpet cleaner? As a seasoned expert in carpet cleaning and repair, with a decade of experience, I’m here to shed light on this common question and provide a comprehensive, easy-to-understand guide.

Use Laundry Detergent in My Carpet Cleaner

Understanding the Difference

To answer this question, it’s important to understand the key differences between laundry detergent and carpet cleaner solutions. Laundry detergent is specifically formulated to clean fabrics like clothing and linens. It contains surfactants and enzymes designed to break down and remove organic and inorganic stains, body oils, and other contaminants commonly found on clothes. Carpet cleaner solutions, on the other hand, are designed for use on carpets, rugs, and upholstery. They are formulated to address the unique challenges of these surfaces, such as deep-seated dirt, odors, and specific types of stains like pet urine and red wine.

Why Using Laundry Detergent Can Be Risky

While it may be tempting to use laundry detergent in your carpet cleaner, it can come with certain risks and drawbacks:

  1. Residue Buildup: Laundry detergents are often designed to leave a residue on clothing, which is typically rinsed away during the washing machine’s rinse cycle. In a carpet cleaner, this residue can accumulate in your carpet and become difficult to remove, potentially leading to a soapy, sticky carpet.
  2. Foaming: Laundry detergents can produce excessive suds or foam when used in a carpet cleaner. This can lead to difficulties in extracting the soapy water from the carpet, leaving it wetter than it should be and potentially causing mold or mildew growth.
  3. Harsh Chemicals: Some laundry detergents may contain harsh chemicals that are not suitable for use on carpets. These chemicals can damage the carpet fibers, fade colors, or even cause allergic reactions when people come into contact with the cleaned carpet.
  4. Residue Attraction: The residue left behind by laundry detergent can actually attract more dirt and grime, making your carpet dirtier faster and negating the cleaning process.

When You Should Use Carpet Cleaner Solutions

For effective and safe carpet cleaning, it’s generally recommended to use solutions specifically designed for carpets and upholstery. These products are formulated to remove the types of stains and soils that carpets commonly encounter, and they are created with the unique needs of carpet fibers in mind.

Carpet cleaner solutions have several advantages:

  1. Designed for Carpets: These solutions are created to tackle the specific challenges of cleaning carpets, such as dirt, pet stains, and odors.
  2. Low Residue: Quality carpet cleaner solutions are designed to leave minimal residue, preventing the issues associated with laundry detergent.
  3. Color-Safe: They are usually safe for use on a wide range of carpet types, ensuring they won’t damage the carpet’s color or texture.
  4. Odor Control: Many carpet cleaner solutions come with built-in odor control features to eliminate unwanted scents effectively.

Also Read: How to Get Blood Out of Carpet?

Conclusion

While the idea of using laundry detergent in your carpet cleaner might seem like a cost-effective solution, it’s essential to consider the potential risks involved. The best approach for effective and safe carpet cleaning is to use solutions designed specifically for carpets. These products are formulated to provide efficient stain removal and help maintain the integrity of your carpet. Remember, a clean carpet not only looks better but also contributes to a healthier indoor environment for you and your family.

Furniture marks on your carpet can be a common and frustrating issue, but fear not! As a carpet cleaning and repair expert with a decade of experience, I’m here to provide you with a detailed guide on how to remove those pesky furniture marks and restore your carpet to its former glory. In this article, we will explore simple and effective methods to address this problem, keeping your carpet looking fresh and beautiful.

Understanding the Culprits

Before we dive into the solutions, let’s understand what causes furniture marks on your carpet. These indentations typically occur due to the weight of furniture compressing the carpet fibers and leaving unsightly imprints. It’s essential to address this issue promptly to prevent long-term damage.

How to Get Furniture Marks Out of Carpet

Prevention Is Key

The best way to deal with furniture marks on your carpet is to prevent them in the first place. Here are some tips to keep your carpet mark-free:

1. Furniture Pads: Use furniture pads or coasters under the legs of heavy furniture items. These pads distribute the weight evenly, reducing the risk of indentations.

2. Regularly Rearrange: Periodically rearrange your furniture to prevent constant pressure on the same areas of your carpet.

3. Carpet Protector: Applying a carpet protector can help create a barrier between the carpet and furniture, reducing the likelihood of marks.

Also Read: What Causes Ripples in Carpets?

How to Remove Fresh Furniture Marks

If you’ve just discovered fresh furniture marks on your carpet, act quickly to prevent them from becoming permanent. Here’s what you can do:

1. Ice Cubes:

When you’ve just spotted fresh furniture marks on your carpet, it’s crucial to act swiftly. Here’s how you can use ice cubes to tackle the problem:

  • Grab a few ice cubes from your freezer.
  • Place the ice cubes over the affected area of the carpet where the marks are visible.
  • Allow the ice cubes to melt slowly. This process may take some time, so be patient.
  • Once the ice has completely melted and dampened the carpet fibers, take a clean cloth or paper towel.
  • Gently blot the affected area. Blotting helps in absorbing the moisture and simultaneously lifts the flattened carpet fibers.
  • Be cautious not to oversaturate the carpet, as excessive moisture can lead to other issues like mold or mildew.

2. Steam or Iron:

Another effective method for dealing with fresh furniture marks is to use either a steam cleaner or a household iron along with a damp cloth. Follow these steps:

  • Fill your steam cleaner with water and allow it to heat up according to the manufacturer’s instructions. Alternatively, set your iron to low or medium heat with steam function if available.
  • Dampen a clean cloth or towel with water and wring it out to remove excess moisture. The cloth should be damp but not soaking wet.
  • Lay the damp cloth over the furniture marks on your carpet.
  • If using an iron, gently run it over the damp cloth in a slow, controlled motion without applying too much pressure. The heat and steam from the iron will help relax the carpet fibers.
  • If you choose to use a steam cleaner, hold it close to the carpet and steam the affected area. Be careful not to over-wet the carpet.
  • After applying heat and steam, carefully fluff the carpet fibers with a spoon or your fingers. Gently stroke the carpet in the opposite direction of the marks.
  • Continue this process until you notice the carpet fibers returning to their original state and the furniture marks becoming less visible.

These methods work well for addressing fresh furniture marks on your carpet. Remember to be patient and gentle in your approach to avoid damaging the carpet fibers further. With the right techniques, you can effectively restore your carpet’s appearance, preventing those marks from becoming permanent blemishes.

Dealing with Stubborn Furniture Marks

1. Vacuuming:

When the furniture marks on your carpet refuse to budge with the initial methods, it’s time to step up your game. Vacuuming is a fundamental step that can help loosen the carpet fibers and reduce the visibility of stubborn marks. Follow these steps:

  • Begin by thoroughly vacuuming the marked area using a vacuum cleaner with a brush attachment. Make sure the vacuum is set to a low or medium setting to avoid causing further damage.
  • The vacuum’s brush attachment will help agitate the carpet fibers, lifting them and breaking up the indentations caused by the furniture.
  • Vacuum the area in multiple directions to ensure that you capture as much lifted fiber as possible. Continue this process until you notice an improvement in the appearance of the marks.

2. Carpet Rake:

To further restore the appearance of your carpet and lift those persistent marks, a carpet rake or fine-toothed comb can be your secret weapon:

  • Use a carpet rake or fine-toothed comb designed for this purpose.
  • Gently and slowly brush the carpet in the opposite direction of the marks. This action helps to lift and separate the flattened carpet fibers.
  • Be careful not to use excessive force, as you don’t want to damage the carpet. Gradually, you’ll notice the carpet fibers returning to their natural position, reducing the visibility of the marks.

3. Towel and Iron:

If vacuuming and using a carpet rake haven’t fully resolved the issue, you can proceed with the towel and iron method. Here’s how it works:

  • Dampen a clean towel or cloth with water and wring it out to remove excess moisture. The cloth should be damp but not soaking wet.
  • Lay the damp towel over the marked area of your carpet.
  • Set a household iron to a low heat setting (without steam) and gently run it over the towel-covered area. The heat from the iron will generate steam from the damp towel, helping to relax the carpet fibers.
  • Be extremely cautious not to leave the iron in one place for too long, as this could damage the carpet.
  • Once the area has been lightly ironed, remove the towel and gently fluff the carpet fibers with your fingers or use a spoon, stroking the carpet in the opposite direction of the marks.
  • Continue this process until the marks become less noticeable, and your carpet’s appearance is largely restored.

These methods are effective for addressing stubborn furniture marks on your carpet. By employing these techniques, you can rejuvenate your carpet and make those once-stubborn marks a distant memory. Always be patient and gentle in your approach, as harsh or aggressive methods can harm the carpet fibers.

Hiring Professional Help

If your carpet still has visible marks, it might be time to consult a professional carpet cleaning service. They have the expertise and equipment to address even the most stubborn furniture marks effectively.

When selecting a professional, make sure to:

  • Check their credentials and reviews.
  • Ask about their methods and equipment.
  • Request a written estimate.
  • Inquire about any guarantees or warranties.

Conclusion

Furniture marks on your carpet may seem daunting, but with the right approach, they can be easily addressed. Preventing these marks and using the techniques mentioned in this article will help keep your carpet in excellent condition. Remember that a well-maintained carpet not only enhances the aesthetics of your home but also prolongs the life of your flooring. If all else fails, don’t hesitate to seek professional assistance to ensure your carpet stays mark-free and beautiful.

Carpets add warmth and comfort to our homes, but if you’ve ever noticed ripples or waves in your carpet, it can be both unsightly and a tripping hazard. In this in-depth guide, I, a carpet cleaning and repair expert with a decade of experience, will explain the common causes of ripples in carpets and how to prevent or remedy this issue. Let’s delve into the world of carpet ripples and understand what causes them.

What Causes Ripples in Carpets

Understanding Carpet Ripples

Carpet ripples are those annoying waves or wrinkles that develop on your carpet, making it look uneven and worn. They occur due to a variety of reasons, and the first step to fixing them is understanding their root causes.

1. Poor Installation

One of the most common causes of carpet ripples is poor installation. When carpet installers fail to stretch the carpet tightly enough or use incorrect installation techniques, it can lead to ripples forming over time. An improperly stretched carpet is more likely to develop these wrinkles, as it doesn’t have the necessary tension to stay flat.

2. Humidity and Temperature Changes

Carpets are sensitive to changes in humidity and temperature. Fluctuations in these environmental factors can cause the carpet fibers to expand and contract. Over time, this expansion and contraction can lead to ripples forming in the carpet. If your home experiences significant variations in humidity and temperature, it’s important to monitor your carpet for any signs of ripples.

3. Heavy Furniture and Foot Traffic

Over time, heavy furniture and high foot traffic areas can compress and damage the underlying padding of your carpet. This can result in localized sagging or rippling. When the padding is compromised, the carpet fibers have less support, making them more prone to developing ripples.

4. Poor Carpet Quality

Low-quality carpet with weak or insufficient backing may also contribute to ripples. When the backing is unable to support the carpet fibers properly, it can lead to bunching or wrinkling over time.

5. Wear and Tear

As carpets age, they may naturally lose some of their resilience and elasticity. This makes them more susceptible to developing ripples, especially in high-traffic areas. Regular wear and tear can exacerbate this issue.

Also Read: How to Get Dents Out of Carpet

Preventing and Fixing Carpet Ripples

Now that we’ve identified the common causes, it’s time to discuss how to prevent and fix carpet ripples.

1. Proper Installation

The best way to prevent carpet ripples is to ensure a proper installation. Hire experienced professionals who follow correct stretching techniques, ensuring the carpet is taut and flat. Insist on a power stretcher to achieve the right tension, which minimizes the chances of ripples forming in the future.

2. Maintain Consistent Indoor Conditions

To minimize the impact of humidity and temperature changes, try to maintain consistent indoor conditions. Use a humidifier or dehumidifier if necessary to control moisture levels. This can help prevent the expansion and contraction of carpet fibers that lead to ripples.

3. Use Furniture Pads

To protect your carpet from heavy furniture, use furniture pads or coasters. These not only prevent ripples but also help in distributing the weight evenly, reducing wear and tear.

4. Rotate and Move Furniture

Regularly move and rotate your furniture to distribute the wear and pressure evenly across the carpet. This can prevent localized sagging and rippling.

5. Replace or Repair

If you already have carpet ripples, you have a few options. You can attempt to stretch the carpet to remove the ripples, but this should be done by a professional. If the carpet is old and heavily damaged, you might consider replacing it or opting for localized repairs.

Conclusion

Carpet ripples can be an eyesore, but understanding their causes and taking preventive measures can help you maintain a flat and smooth carpet. Proper installation, maintaining consistent indoor conditions, using furniture pads, and regular maintenance are key to keeping your carpets ripple-free.

By following these tips, you can enjoy your carpets for many years to come without worrying about unsightly ripples. For further guidance on carpet care, consult reputable sources like the Carpet and Rug Institute (CRI) and professional carpet installation services. Keep your home cozy and your carpets flat!

Carpets can transform any room, making it cozy and inviting. However, over time, they may develop unsightly dents or indents from heavy furniture or foot traffic. These carpet dents can be frustrating, but fear not! In this comprehensive guide, I, a carpet cleaning and repair expert with a decade of experience, will walk you through the process of getting those dents out of your carpet, ensuring your carpet looks fresh and inviting once again.

Understanding Carpet Dents

Before we dive into the removal process, let’s understand what causes carpet dents. These dents are usually the result of furniture pressing down on the carpet fibers over time, causing them to become compressed and matted. The longer the furniture remains in one spot, the more pronounced the dent can become.

How to Get Dents Out of Carpet?

While some minor dents may disappear on their own with time, more stubborn ones require a bit of effort to fix. Here’s how you can restore your carpet’s plush appearance.

Step 1: Gather Your Tools and Materials

To effectively remove carpet dents, you’ll need the following items:

  • Ice cubes
  • A fork or spoon
  • A clean, white towel or cloth
  • An iron (steam iron is preferred)
  • A vacuum cleaner
  • Carpet fluffing brush (optional)

Step 2: Assess the Damage

Before you proceed, take a close look at the dents. Are they minor or severe? Minor dents may respond well to simpler methods, while stubborn, deep dents may require a bit more effort.

Step 3: Ice It Up

For those minor dents, the ice method works wonders. Here’s how to do it:

  • Place a few ice cubes on the dent, ensuring they cover the entire area.
  • Wait for the ice to melt, which may take a couple of hours.

As the ice melts, it will gradually rehydrate the carpet fibers. Once it’s fully melted, the fibers should naturally start to regain their original shape. Use a clean white towel or cloth to blot up any excess moisture, and then gently fluff the carpet with your fingers.

Step 4: Fork or Spoon Fluffing

For dents that are still visible after the ice treatment, you can try using a fork or spoon to fluff the carpet fibers:

  1. Place the fork or spoon under the compressed fibers.
  2. Gently lift the fibers upward to encourage them to stand back up.

This method is most effective on low-pile carpets, and you should take care not to damage the fibers.

Step 5: Steam It Out

For stubborn, deep dents, steam can be your best friend. Here’s what to do:

  1. Fill your iron with water and set it to the steam setting (medium heat).
  2. Place a clean, white towel or cloth over the dent to protect it from direct heat.
  3. Gently press the iron over the cloth for about 30 seconds. Be careful not to touch the carpet directly with the iron as excessive heat can damage it.

The steam from the iron will help relax the carpet fibers. After steaming, use your fingers or a carpet fluffing brush to encourage the fibers to regain their natural position. Repeat the process as needed until the dent is no longer visible.

Step 6: Vacuum and Fluff

Once the dents are no longer visible, use a vacuum cleaner to give your carpet a thorough cleaning. This will help fluff up the carpet fibers and ensure they are evenly distributed. Additionally, you can use a carpet fluffing brush to further enhance the appearance of your carpet.

Step 7: Prevent Future Dents

Prevention is always better than cure. To avoid future dents in your carpet, consider using furniture coasters or carpet padding under heavy furniture. Additionally, regularly moving your furniture slightly can help prevent long-term dents from forming.

Conclusion

Removing dents from your carpet is a manageable DIY task that can breathe new life into your flooring. Whether you opt for the ice method, fork or spoon fluffing, or steam treatment, the key is patience and a gentle touch. Always be cautious when using heat to avoid damaging the carpet fibers.

By following this step-by-step guide, you can enjoy a beautifully restored carpet, and you won’t have to worry about unsightly dents anymore. Remember, taking good care of your carpet is essential for maintaining a clean and comfortable living space.

For further guidance on carpet care and repair, you can consult reputable sources like the Carpet and Rug Institute (CRI) and professional carpet cleaning services. Additionally, check out our website for more tips and tricks to keep your carpets looking their best.